|
Matting and framing 2D art
Topics: Matting and Framing Works on Paper Framing Canvases Attaching Hangers
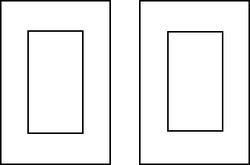 Centered (left), bottom wider (right) 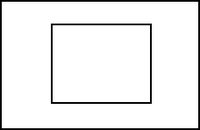 Awkward matting  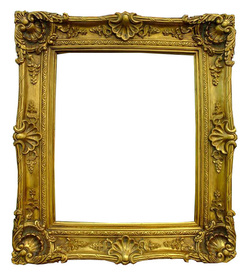 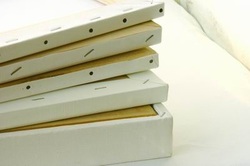 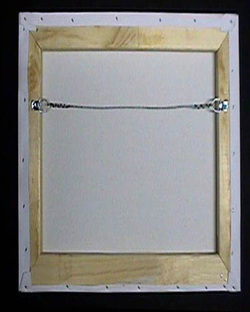 |
As clothes make the man, presentation makes the art. Poor presentation diminishes quality art, and good presentation enhances less skillful art. Honor your artwork and your audience by framing it as well as you can.
Matting and Framing Works on Paper Works on paper are usually matted and framed under glass to protect the art. Taking the work to a professional framer gets you the best quality, but it can be expensive and you have to get the work to the framer at least two weeks in advance of your deadline. However, if your artwork fits standard size frames and mats (see the sizes at left), you can easily learn to assemble ready-made frames and ready-cut mats. As an artist you already have a basic understanding of design and color that will help you select the right mat and frame. Choosing a mat You can see and handle matboard samples (corners) in any framing shop and at craft stores like Hobby Lobby and Michael's. Take your art to the store and try out different corners right on your work. Here are a few things to consider:
Sizing a mat The size of the mat relative to the opening for the art depends partly on the fashion of the day and partly on tradition. Take a look at what local galleries and museums are doing with matting to be aware of the latest trends and expectations for different types of art. The traditional size of the mat margin is about 1 3/4 to 2 1/2 inches all around, often with the bottom dimension 1/4 to 1/2 inch larger than the other three sides. I was taught that this slight increase in the bottom dimension compensates for an optical illusion whereby exact centering makes the centered thing look as if it is below the center. The larger dimension is at any rate a convention. Ready-cut mats are symmetrical so that they can be used in any orientation, but they always look a little wrong to my eye. For small artworks, mat margins can be much larger than the traditional size, to give the work a greater presence and importance. A common mistake is to size the mat too small for the artwork. The mat functions like margins on a page. Look at books and web pages. Some have a lot of white space, which makes it easier to read the text, while some are crowded with minuscule margins that leave no visual space to breathe. Unless you have a reason for a crowded feel, be generous with mat margins. In your desire to spend as little as possible on framing, beware of using the mat to make your nonstandard-size art fit into a standard-size frame. Usually, either the mat will be too small or large or the side dimensions will be different from with the top and bottom dimensions. The whole framing job ends up making the art look awkward instead of confident. Instead, buy a semi-custom frame (see Choosing a Frame below) and size the mat properly. Cutting a mat Don’t cut your own mats. I learned this the hard way, when an artist I was trying to impress looked at my work and said only, "The corners of your mat aren't square." Having a mat cut is quite inexpensive, and framers can often do it while you wait or within a day or two. If you decide to cut your own mats, use professional mat-cutting equipment. The small hand-held cutters are nearly impossible to use accurately. Do-it-yourself framing shops have big, quality cutters and will show you how to use them. You will need to practice before you get it right. Choosing a frame As with mats, the art should be the center of attention, not the frame. An experienced framer can put together an ornate frame with double mats that looks good with a particular artwork, but can you? Simpler is safer if you're not sure. The most expensive option is to have a custom frame cut for your piece. You can save a little money by ordering the frame online rather than buying through a frame shop. But then you can’t actually try out the frame next to your artwork. Less expensive is to use a semi-custom frame. Craft stores sell black, silver, and gold metal frames in 1-inch increments. You buy two pairs for a complete frame. If you had the foresight to create your artwork so that it fits into a standard-size frame, frame supply stores and craft stores have a fairly good selection of premade wood and metal frames in many finishes and colors. I have one friend who buys frames at garage sales and then makes art to fit them. I never was able to work that way, but if you can, why not? Choosing the other materials Buying glass or Plexiglas at a glass shop is usually cheaper than buying it at a craft store. Plexiglas is best for larger works because it is lighter weight than glass. Be aware that it scratches more easily than glass, and you can’t use glass cleaner on it, only a Plexiglas cleaner. Use an acid-free backing, such as conservation matboard or acid-free foamboard. Don’t economize on this, as over time (sometimes only a few months) an acidic backing can cause paper to yellow like old newspaper. Use archival linen tape or a paper hinge and wheat-starch paste to attach the artwork to the backing. Framing Canvases If your work is on a prestretched canvas that has staples on the sides, you will have to frame it, both because the staples look unfinished and the stretchers tend to twist and won't lie flat against the wall. Frames meant for stretched canvas are constructed differently than those for works on paper, so be sure to buy the correct type if you are ordering one. You can also make a simple frame if you have access to a miter saw and a hammer. Just cover the sides of the canvas with painted or stained wood lath. If the canvas is wrapped around the stretchers so the staples are on the back and the canvas lies flat, then you can frame or not, your choice. So-called museum profile or gallery profile canvases have deep sides and are meant to be left unframed. If you choose not to frame a canvas, it will look more finished to paint the side edges. You can use a neutral color or black, or continue the painting from the front onto the sides. Attaching Hangers The most important advice I can give you about hangers is to make sure they are sturdy! One artwork in a HopeArts exhibit came crashing off the wall because the artist didn’t screw the eye hooks well enough into the wood frame. The glass broke and the frame was dinged. Another lightweight work mounted on foamboard floated quietly off the wall because the wire was taped on. The corners of the foamboard, and the art attached to it, crumpled. I have discovered no tape that holds wire permanently on even the lightest unframed art – not duct tape, not electrical tape, not artist’s tape. Check with your gallery to find out what kind of hanging hardware to use. A professional hanging system usually requires wire. Sawtooth hangers, loop hangers, and hooks do not work. Here are a few tips on attaching wire:
|


Hope and the Visual Arts by Kate Van Dyke is licensed under a Creative Commons Attribution-NonCommercial-NoDerivs 3.0 Unported License.
Based on a work at www.hopeva.weebly.com.
Permissions beyond the scope of this license may be available at http://www.hopeva.weebly.com.
